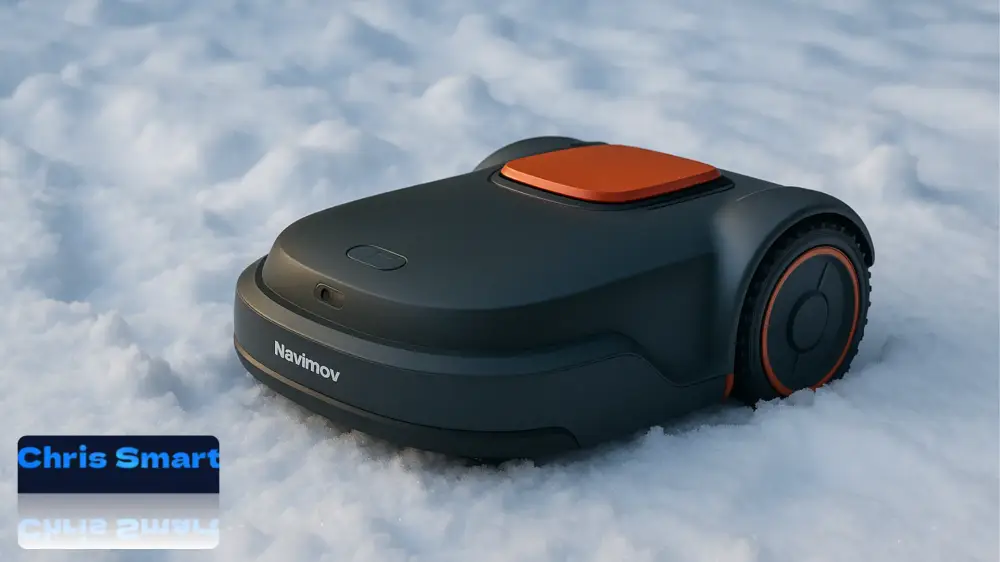
With autumn, the mowing season ends in most gardens. While the lawn goes into its winter dormancy, your robotic lawnmower also needs a break. To ensure that this smart helper is ready for action again in the spring, it should be carefully prepared for the winter months. Do you want to winterize your robotic lawnmower? These guidelines apply not only to the Navimov i105 or i108, but also for models from other manufacturers such as Husqvarna or Gardena.
Many garden owners underestimate how strong Cold, dampness and frost The battery and sensitive electronics can be affected by the weather. The charging station and antenna are also susceptible to the elements and require protection or a dry place for winter storage. Proper winter storage not only extends the device's lifespan but also prevents unnecessary repairs and costs.
In this guide, we will show you step by step how to set up your Navimow i Series Store your robotic lawnmower safely – from battery care and disassembly of the charging station to proper cleaning and storage. This ensures your robotic lawnmower is ready to go next spring.
The correct procedure for winterizing a robotic lawnmower can be crucial for its performance next year.
This article will guide you step-by-step through:
- how to protect batteries and electronics from frost damage,
- why marking the location of the charging station is important,
- how to properly clean blades and housings,
- and under what conditions the robot can best overwinter.
This is how you ensure that your robotic lawnmower works smoothly even after a long winter break – and that you can start the new season relaxed.
1. What you need for winter storage
Before you begin the actual winter storage, you should take some time to gather all the necessary tools and materials. This will ensure that each step runs smoothly and you don't have to interrupt the process later. For disassembling, cleaning, and safely storing your robotic lawnmower, we recommend the following equipment:
- Screwdriver: To loosen the mounting screws on the charging station and antenna. Please do not use power tools to avoid damaging delicate parts.
- Brush: Helps to thoroughly remove grass clippings, soil and dirt from the robotic lawnmower.
- Protective gloves: This is especially important when removing the blades to avoid injuries.
- 4 silicone posts: These are included in the delivery and serve as markers for the exact position of the charging station. This allows you to easily reposition the station in the spring without having to remeasure.
With these few but important tools, you are ideally prepared to overwinter your robotic lawnmower and thus make it winter-proof step by step.
2. Charge the battery and switch off the device.
The battery is the heart of your Navimow i and significantly determines how reliably and durably your robotic lawnmower operates. Since it is a modern Lithium-ion battery Since it's an electric vehicle, it requires special care, especially during the winter months. Cold temperatures and deep discharge can significantly shorten its lifespan – therefore, this step is particularly important.
Charge the battery correctly
Before storing the robotic lawnmower, you should check the battery. approx. 85 % to recharge its capacity. This value is ideal for a so-called Deep discharge To avoid problems that can occur when a battery remains completely discharged for an extended period. Deep discharge often leads to permanent damage and can render the battery unusable.
⚠️ Important:
- Charge the battery not to 100 % full, as a continuous full charge can also put a strain on the cells.
- Also avoid storing the device with a nearly empty battery.
Turn off the device
Once the battery is charged, the device should be completely switched off:
- Remove the robotic lawnmower from the charging station.
- Press and hold the Press OK button for approximately 3 seconds, until the power-off menu appears.
- Confirm with your PIN code (if theft protection is active).
- The device is now shutting down in a controlled manner and can be safely stored.
If you have forgotten your PIN code, you can retrieve it via the app in the menu. Settings > Lawn Mower > Reset PIN Code Request a new one.
Battery care during the winter break
Even when your Navimow i is switched off, the battery will slowly discharge itself over time. Therefore, Segway recommends discharging the battery during extended storage. to reload. To do this, it is sufficient to briefly restart the mower and then switch it off again.
💡 Tip: Set a reminder in your calendar or on your smartphone to keep an eye on the battery level throughout the winter break. This will prevent the charge level from dropping too low unnoticed.
Why this step is so important
- Extended lifespan: Proper battery care can extend the battery life by years.
- Ready to go in spring: If the battery is optimally maintained during the winter break, your Navimow i will start immediately in the spring without any problems.
- Save costs: Replacing a lithium-ion battery is expensive – proper maintenance will help you avoid unnecessary follow-up costs.
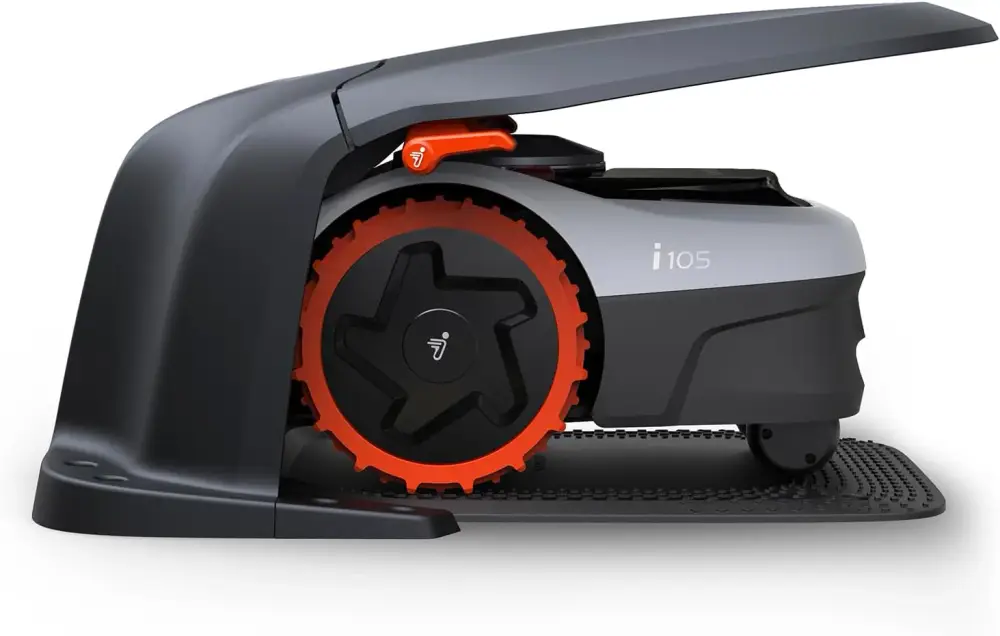
3. Dismantle charging station & mark location
The charging station The charging station is the central link between your Navimow i and the power supply. It ensures that your robotic lawnmower is always charged in time and reliably adheres to its mowing schedule. However, it is also directly exposed to the elements: moisture, frost, and dirt can eventually damage the contacts and impair its function. Therefore, it is essential to store the charging station in a dry location during the winter months.
Step-by-step disassembly instructions
- Unplug the power cord
- Before you loosen or loosen anything on the station, disconnect it from the power supply. This increases safety and prevents possible short circuits.
- Disconnect the antenna cable
- Carefully unplug the antenna cable. Be careful not to bend or pull it too sharply, as cable breaks can impair signal quality.
- Remove screws
- The station is usually attached to the base with four screws. Loosen these with a suitable screwdriver.
- Make sure to store the screws properly, ideally in a small bag – this will save you a lot of time searching for them in the spring.
- Mark the location with silicone posts
- Set the four silicone posts insert the markers into the drill holes of the station. These markers are extremely practical, as they allow you to immediately remount the station in exactly the same spot in the spring.
- This method saves you the tedious alignment and remeasuring that would otherwise be necessary to ensure accurate positioning.
Tips for using the station
- Leave posts in the ground over winter: The silicone posts are weather-resistant and can remain in the ground without any problems. They help you find the exact right position, even after months.
- Label screws and accessories: If you have equipped several garden areas with accessories, it is helpful to label screw bags or individual parts to avoid confusion in the spring.
- Clean contact points: Take this opportunity to clean the metal contacts on the station with a dry cloth. This will prevent dirt or moisture from causing corrosion during the winter.
Why this step is so important
- Protection against frost and moisture: If the station remains outdoors, it can become unusable due to frost damage.
- Time savings in spring: Thanks to the silicone posts, no realignment or remeasuring is necessary.
- Ensuring signal quality: By protecting the antenna and cables, you avoid connection problems that could otherwise occur at the start of the new season.
💡 Tip: Store the charging station, antenna, and mower together in the same box. This way, you'll have all the components together in the spring and avoid misplacing cables or screws.
4. Remove the antenna
The antenna is a crucial component of the Navimow i Series, as it ensures satellite reception and precise navigation. To prevent damage from frost, moisture, or mechanical stress during the winter months, it should also be protected.
- Loosen the screw: Remove the screw that secures the antenna to the bracket. Be careful not to damage cables and connectors.
- Remove the antenna: Disconnect the antenna from the cable and store it together with the charging station and the robotic lawnmower in a dry place.
- Alternative – Local protection: If the antenna is permanently mounted to a wall, post, or under a roof and is difficult to remove, you can protect it in place. Use a weatherproof cover, for example, a robust one. plastic bag, tarpaulin or special protective cover. It is important that the antenna is completely protected from rain, snow, and ice.
⚠️ Note regarding commissioning in spring: If you dismantle the antenna in winter and reinstall it in the same location in spring, the boundary map will usually remain intact. However, if the antenna is installed in a different location or its position is changed, it may be necessary to recreate the map. Allow some extra time for this when you reactivate the antenna.
These steps ensure that the antenna of the Navimow i Series remains reliably protected and is immediately available again for precise mowing in the spring.
5. Remove the blades and clean the lawnmower
Thorough cleaning is an important part of winter storage. The blades and underside of the Navimow i Series, in particular, are subjected to heavy wear and tear during the season and become clogged with grass clippings and soil, which also contains moisture. If the robotic lawnmower is stored in this condition, rust, mold, or a stiff drive mechanism can occur in the spring. Therefore, you should allow sufficient time for this step.
- Put on protective gloves: The blades are very sharp and pose a risk of injury. Therefore, be sure to put on sturdy gloves before removing them.
- Remove blades carefully: Loosen the screws and set the blades aside. Take this opportunity to check their condition – replace any dull or damaged blades with new ones so the robot can deliver clean cuts again next spring.
- Clean the underside: Carefully turn the robotic lawnmower upside down and remove all grass clippings, soil, and dirt with a brush. Pay particular attention to the area around the blade holder and wheels, as stubborn residue often accumulates there.
- Let it dry: Allow the device to dry completely in a well-ventilated place before packing or storing it. Moisture inside can lead to corrosion and damage electronic components.
💡 Tip: If you thoroughly clean your robotic lawnmower and replace the blades at the same time, you will save time in the spring and can start the new season immediately.

30-piece set of premium robotic lawnmower blades
Replacement blades compatible with Segway Navimow i Series i105E and i108E robotic lawnmowers
6. Packaging & Storage
Proper storage is crucial for ensuring your Navimow i Series survives the winter months undamaged and is ready for use again in the spring. Besides temperature, the following factors play a particularly important role: Dryness, protection from dust and safe storage a role.
- Store all accessories: Carefully pack the lawnmower, charging station, antenna, cables, and screws. Ideally, the Original packaging, as it is specifically designed for the device and offers optimal protection. Alternatively, you can also use a sturdy transport case or a cardboard box with cushioning material.
- Store the device in a protected location: Choose one dry, frost-free location For storage, a cellar or a heated storage room is ideal. Avoid damp rooms such as garden sheds or uninsulated garages, as condensation can quickly form there.
- Note the temperature range: The manufacturer recommends storage between 5 °C and 45 °C. Extreme cold or heat can damage the battery and electronics.
- Ensure battery protection: Even during the winter break, the battery should not be completely discharged. Therefore, check the charge level every few months and recharge the robot if necessary.
- Protection against impacts and pressure: Ensure that no heavy objects are placed on the packaging. Excessive pressure could damage the casing or sensitive components.
Conclusion
Winter storage of your Navimow robotic lawnmower is more than just a precautionary measure – it is a crucial contribution to Durability, reliability and performance. With a little preparation, you can protect the battery, electronics, and mechanics from the stresses of cold and moisture.
If you follow the steps described, you can be sure that your Navimow will be ready for use without any problems in the spring and that you can immediately benefit from a perfectly manicured lawn again.
💡A few hours of careful maintenance in autumn can often save you from costly repairs or a bumpy start to the new season. This way, you not only enjoy smooth operation but also significantly extend the lifespan of your robotic lawnmower.
👉 Do you already have your own tips for winter storage or questions about individual steps?
Feel free to share your experiences and tips in the comments below.

Navimow i105E robotic lawnmower
Without boundary wire, max. up to 600 m²
Navimow Garage S
Foldable, no signal blockage, protection from sun and rain, accessory for Navimow i105E, i108E robotic lawnmowers
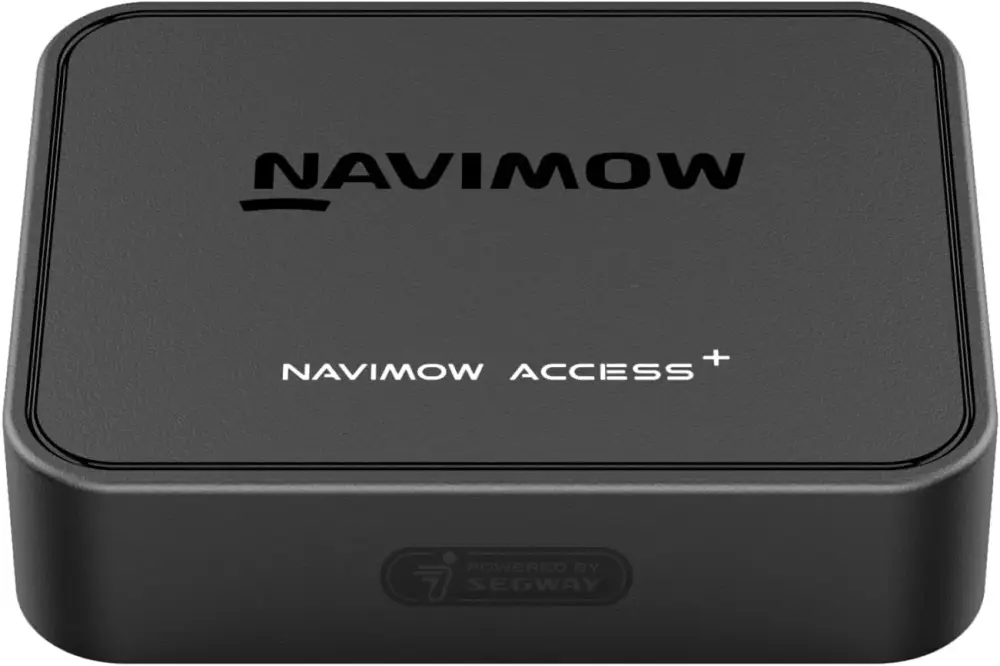
Navimow Access+ 4G module,
Required for 4G connectivity and theft protection, accessory for Navimow i105E, i108E robotic lawnmowers
Source/Photo: (Amazon / Navimow / Chrissmart)

My name is Christian, and I founded this blog in 2024. I'm a trained communications electronics technician, a tech enthusiast, and a smart home aficionado with many years of experience in the field of networked household appliances. I passionately follow current developments and regularly test new products to provide clear insights and practical recommendations.